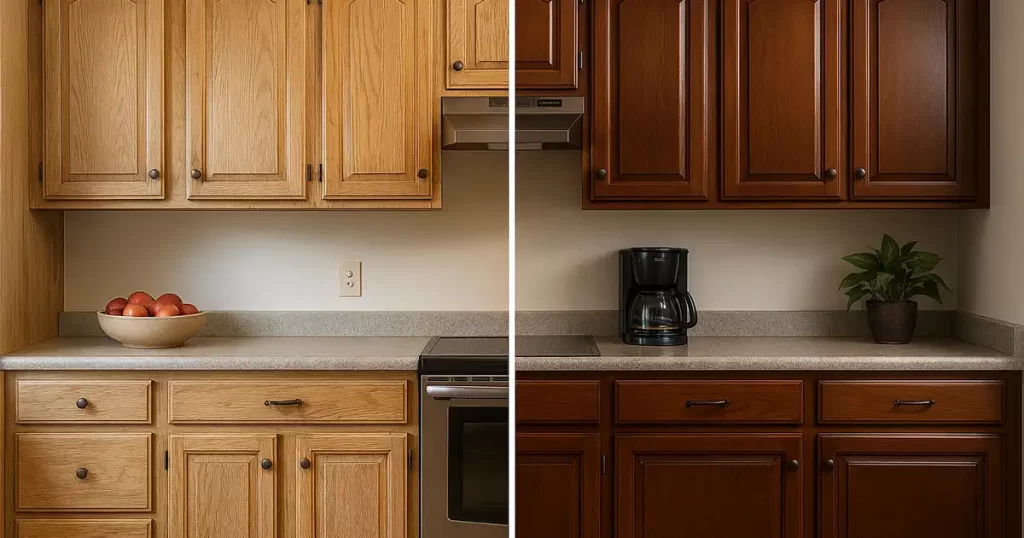
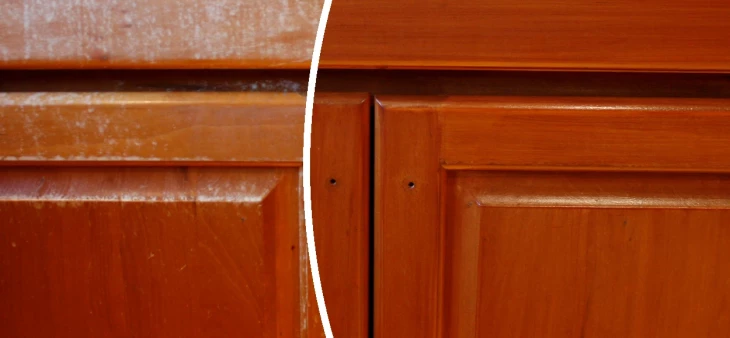
Clean, sand, condition, stain, and seal cabinets for a durable, rich finish.
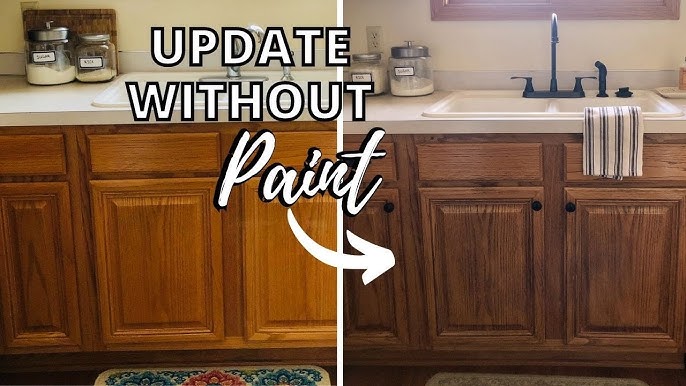
If you want a pro look without a full remodel, learning how to refinish kitchen cabinets with stain is a smart move. I’ve led dozens of cabinet makeovers for clients, and I’ll walk you through every step with clear, field-tested tips. Follow this guide to choose the right stain, prep like a pro, and seal a finish that lasts.
Before you start: are your cabinets good candidates?
Not every cabinet can take a stain well. You need wood or real wood veneer. Laminate and most thermofoil cannot absorb stain. If your doors are solid oak, maple, cherry, alder, or birch, you’re set. Veneer also works if you sand with care.
Check what is on the wood now. If it has a clear coat, plan to sand to bare wood for a true penetrating stain. Gel stain can sit on a scuffed clear coat, but the look is different. It acts more like colored wiping varnish. For painted cabinets, you must strip to wood if you want a stained look.
Do a quick test. Drip water on a sanded spot. If it beads, there is still finish. If it soaks in, you are close to bare wood. Also inspect for damage, loose joints, or warped doors. Fix these before staining.
If the home is older, avoid dry sanding suspect old coatings indoors. Use a shop vac with HEPA and follow safety rules. Always check product labels and manufacturer technical data sheets for use, temps, and dry times.
Tools and materials
You do not need a cabinet shop to learn how to refinish kitchen cabinets with stain. But you do need the right kit.
Tools
- Screwdrivers, a drill, and labels for every door and drawer
- Zip bags for hinges and screws
- Drop cloths, painter’s tape, and plastic sheeting
- Degreaser or TSP substitute, and clean rags
- Random-orbit sander and sanding block
- Sandpaper in 120, 150, 180, and 220 grits
- Shop vac with HEPA filter and a soft brush head
- Tack cloths or microfiber cloths
- Putty knife, wood filler, or grain filler if needed
- Foam brushes and natural bristle brushes for oil products
- Synthetic brushes for water-based products
- Lint-free staining rags
- Optional HVLP sprayer for clear coats
Finishes
- Pre-stain wood conditioner for blotch-prone woods
- Stain: oil-based, gel, or water-based
- Clear coat: water-based polyurethane, oil-based polyurethane, or pro-grade waterborne finishes
Safety
- Nitrile gloves, safety glasses, and hearing protection
- NIOSH respirator with organic vapor cartridges
- Metal container with water for oily rags to prevent fires
Safety and setup
Good prep makes the job smooth and safe. This is key when you learn how to refinish kitchen cabinets with stain.
Ventilation matters. Open windows and add a fan pulling air out. Turn off pilot lights and avoid sparks near solvents. Oily rags can self-ignite. Lay them flat to dry outdoors or store in a metal can full of water. Then follow local disposal rules.
Set up a clean work zone. I use two sawhorses and 2x4s with screws at the ends to act as drying rails. Mark every door and drawer with tape inside the hinge cup or on an edge. Keep hardware in labeled bags.
Dust is the enemy of a clear topcoat. Vacuum the room, not just the cabinets. If you can, move doors to a garage or clean room for finishing.
Step-by-step: how to refinish kitchen cabinets with stain
Follow this simple path. It is the same workflow I use on paid jobs.
- Remove doors, drawers, and hardware. Label everything.
- Degrease all parts. Kitchens hide oil and smoke film. Rinse and dry.
- Scuff sand with 120 or 150 grit to cut the old finish.
- Sand to bare wood with 150, then 180 grit. Use a block on profiles.
- Vacuum dust. Wipe with a damp cloth. Let dry. Wipe with a tack cloth.
- Fill dents or holes. Let cure. Sand flush. Spot-sand to 180 or 220.
- Wipe with mineral spirits to preview color and find scratches.
- Apply pre-stain wood conditioner if the species needs it. Follow label times.
- Stir stain well. Do not shake. Test color on the back of a door.
- Stain edges first, then large faces. Work in sections. Keep a wet edge.
- Wipe off excess with the grain within the time on the can.
- Let dry. Lightly sand with 320 grit if the surface feels rough. Remove dust.
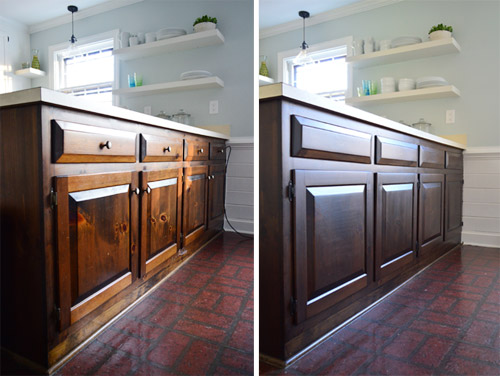
- Seal with your clear coat. Apply thin, even coats. Sand lightly between coats.
- Reassemble when the finish cures hard. Add new bumpers and hardware.
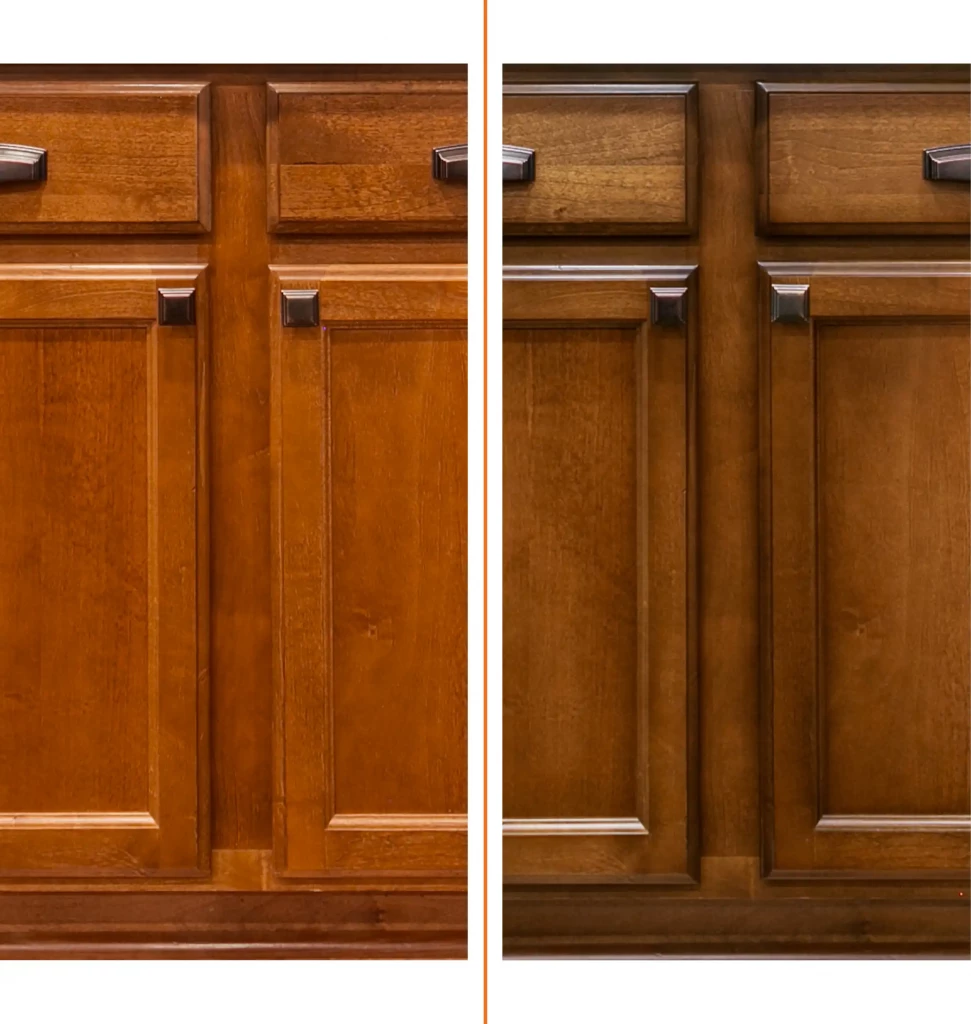
Tip: If you want a darker color, use two thin stain coats or tint a clear coat for a toner layer. Thick stain that sits wet will cause tacky spots and blotches.

Choosing the right stain and color
Picking stain is where many projects shine or fail. When you learn how to refinish kitchen cabinets with stain, start with wood species and your target look.
Stain types
- Oil-based penetrating stain. Forgiving open time, rich tone, great for oak and alder. Needs longer dry time. Use natural bristle or lint-free rags.
- Gel stain. Thick, sits on top, great control on vertical parts and over old finishes. Ideal when you cannot sand to bare wood everywhere.
- Water-based stain. Low odor, fast dry, easy cleanup. Can raise grain. Best on clean, even-sanded wood.
- Dye stain. Deep, even color, great on tight-grain woods like maple. Often sprayed or wiped with practice.
Color tips
- Test boards are non-negotiable. Sand and prep sample boards like the doors. Try one coat, then two. Topcoat a test to see the final color.
- Mind undertones. Warm stains have red or yellow notes. Cool stains lean gray or brown. Lighting in your kitchen changes the read.
- Use conditioner on blotch-prone woods like pine, birch, and cherry. Follow the exact wait window before staining.
- If you want a modern, even look, consider a neutral brown or light walnut. If you love grain, a light natural stain will show it.
Sanding and surface prep in detail
Prep is 70% of how to refinish kitchen cabinets with stain. Slow here. Fast later.
Sequence
- Strip grease first. Sanding pushes oil deeper if you skip cleaning.
- Start with 120 or 150 grit. Stop when the old finish is gone.
- Move to 180, then 220 on face frames and doors. Do not skip grits.
- Sand with the grain. Avoid cross-grain marks that stain will show.
- Hand-sand edges and profiles. Do not round crisp edges.
Veneer care
- Most veneers are about 0.6 mm thick. Use light pressure and fresh paper.
- If you see glue lines or a color change, stop. Switch to chemical stripping for that spot and then sand gently.
Dust control
- Vacuum after each grit with a brush head. Wipe with a damp cloth. Tack before stain.
- Water-based stain raises grain. Pre-raise by wiping with water, letting dry, and sanding with 220 before staining.

Stain application techniques
There is more than one way to apply stain. Choose based on your product and pace.
Wipe-on method
- Load a lint-free rag. Work edges first, then faces.
- Flood the surface, then even it out. Wipe off excess in 3 to 5 minutes or per the label.
Brush-and-wipe method
- Brush stain into profiles and grain. Follow with a clean rag to pull off extras.
- Great for oak where grain can trap stain.
Gel stain over an old finish
- Clean and scuff sand with 220. Do not cut through to bare spots.
- Wipe on gel stain thin. Tip off with a brush. Let dry longer than oil stain.
- Apply two to three thin coats for an even tone. Seal with a clear coat.
Spray-and-wipe (advanced)
- Spray stain for even wet-out. Wipe off at the same pace. Keep sections small.
- This helps reduce lap marks on big doors.
Environment
- Work at 65 to 75°F with moderate humidity. Cold slows dry. Heat speeds up and can cause lap marks.
- Stir often. Pigment settles fast.
Sealing and topcoats
A good clear coat protects the color and adds depth. It is a key step in how to refinish kitchen cabinets with stain.
Options
- Water-based polyurethane. Low odor, non-yellowing, fast recoat. Great for most homes.
- Oil-based polyurethane. Warm tone and strong build. Longer cure and some yellowing.
- Pro waterborne 2K poly or conversion varnish. Hard, chemical resistant, and often sprayed. Follow pro safety steps.
Application
- Apply two to three thin coats. I aim for three on doors and two to three on boxes.
- Lightly sand between coats with 320 to 400 grit. Remove dust fully.
- Choose sheen to match your style. Satin hides smudges. Semi-gloss looks crisp.
Cure times
- Dry to touch in hours. Recoat per label, often 2 to 6 hours for water-based, longer for oil.
- Full cure takes days to weeks. Be gentle with doors for the first two weeks.

Drying, curing, and reassembly
Plan your timeline. This reduces smudges and dings.
- Let stain dry fully before clear coat. If a rag stuck to it, it is not dry.
- After your last clear coat, wait the full cure time before reassembly if you can. At least 24 to 48 hours in most homes.
- Add bumpers to doors. They cut noise and protect the finish.
- Upgrade hinges or pulls now, while parts are off. Soft-close hinges feel like a full remodel.
I like to stage doors on drying racks. I flip after the first clear coat on the back, then do the face last for the best look.
Costs, time, and common mistakes
Knowing real numbers helps you plan how to refinish kitchen cabinets with stain.
Typical costs
- Consumables and finishes for a mid-size kitchen: 150 to 400 dollars.
- New hardware: 100 to 300 dollars.
- Tool upgrades, like a sander or sprayer: optional and variable.
Time
- A 20-door kitchen takes 3 to 5 days of part-time work.
- Add time for drying, repairs, and topcoats.
Common mistakes
- Skipping degreasing. Oil blocks stain. Clean first.
- Over-sanding edges. Keep profiles crisp.
- Not labeling doors. Reassembly becomes a puzzle.
- Letting stain sit too long. It turns sticky. Wipe on time.
- Shaking cans. This adds bubbles. Stir instead.
- Dusty space. Dust lands in the clear coat. Clean the room.
- Rushing cure. Hardness comes with time. Be patient.
Care and maintenance
Protect your new finish so it stays fresh.
- Clean with mild soap and water. Avoid ammonia or harsh cleaners.
- Wipe spills fast. Water and steam can haze a new finish.
- Use hood vents when cooking. Heat and grease age finishes.
- For scuffs, rub lightly with a non-abrasive pad and a dab of soapy water. Dry at once.
- Keep touch-up stain and a small brush for nicks. Seal small fixes with a drop of clear.
Troubleshooting stain problems
Even pros hit snags. Here is how to fix the most common issues when learning how to refinish kitchen cabinets with stain.
Blotchy color
- Cause: uneven sanding or no conditioner on blotchy woods.
- Fix: sand back, apply conditioner, and restain. Or glaze and tone under the clear.
Lap marks
- Cause: stain drying too fast or working in big sections.
- Fix: work smaller areas. Add extender if the product allows. Blend with a toner coat.
Tacky stain
- Cause: thick coat or cool, damp air.
- Fix: wipe with mineral spirits to lift excess. Let dry longer. Always wipe on time.
Raised grain
- Cause: water-based stain on un-raised wood.
- Fix: pre-raise grain. Sand with 220. Restain.
Fish-eyes in clear coat
- Cause: silicone or oil contamination.
- Fix: clean with solvent, use a barrier coat like dewaxed shellac, then recoat.
Frequently Asked Questions of how to refinish kitchen cabinets with stain
Can I stain over my old finish without sanding to bare wood?
Yes, with gel stain you can stain over a scuffed clear coat. Clean well, sand lightly with 220, apply thin coats, and seal.
How many coats of stain should I apply?
Usually one to two thin coats. Stop when you reach the color you want, then build protection with clear coats.
What grit should I finish sanding at before staining?
Stop at 180 or 220 grit. Finer grits can close the pores and reduce stain absorption.
Do I need a wood conditioner?
Use it on blotch-prone woods like pine, cherry, birch, and maple. Follow the label window between conditioner and stain.
What is the best clear coat for kitchens?
Water-based polyurethane is a great all-around choice. It dries fast, resists yellowing, and is easy to maintain.
How long should I wait before rehanging doors?
Allow at least 24 to 48 hours after the final clear coat. Handle with care for two weeks while the finish cures.
Can I change from dark to light with stain?
Only if you sand to near bare wood. Stain is transparent and dark colors will show through if left in the pores.
Is spraying better than brushing?
Spraying gives a smoother clear coat but needs skill and setup. Brushing or rolling and tipping works well for most DIY jobs.
Conclusion
You now know how to refinish kitchen cabinets with stain from start to finish. Clean well, sand with care, test your color, wipe thin coats, and protect with a tough clear. Those small, steady steps add up to a pro result.
If this guide helped, try one door as a test run this weekend. Come back with questions, share photos, or subscribe for more hands-on kitchen upgrades.