Simmer unsalted butter, skim foam, strain milk solids—golden ghee appears.
If you want to learn how to make homemade ghee, you’re in the right place. I’ve taught many home cooks, tested small and big batches, and learned what actually works. This guide shows you how to make homemade ghee with clear steps, trusted tips, and fixes for common mistakes. By the end, you will feel confident, calm, and ready to cook.

What Is Ghee and Why It’s Different From Butter
Ghee is clarified butter that has been gently cooked. The water evaporates. The milk solids brown and settle. You strain the liquid fat and get a nutty, aromatic oil.
It has a high smoke point. Many culinary texts place it near 450°F (232°C). That makes ghee great for searing, roasting, and tempering spices. Ghee also keeps longer than butter because it has no water and almost no milk solids left.
Knowing how to make homemade ghee gives you control over taste, color, and aroma. You can make it light and mild. Or let it brown a bit more for deeper, toasty notes.
People also ask
Is ghee the same as clarified butter?
They are close. Clarified butter removes water and milk solids, but ghee cooks the solids longer for a nutty flavor.
Is ghee lactose-free?
Ghee is very low in lactose and casein. Many people who avoid dairy tolerate ghee, but sensitive folks should test with care.
What does ghee taste like?
It tastes rich, clean, and nutty. Think toasted hazelnut meets warm caramel.

Why Make Ghee at Home
You can tailor the flavor. You can choose your butter source. You can save money.
Store ghee can taste flat. When you learn how to make homemade ghee, you control the browning. You can stop early for a light gold oil. Or cook longer for a deep amber finish and bold aroma.
Home ghee often costs less per ounce. You also reduce waste with glass jars you already own. The best part: you know what is in it.
Ingredients, Tools, and Sourcing Tips
What you need:
- Unsalted butter. Grass-fed butter adds rich color and aroma.
- Heavy-bottomed saucepan or small pot. Thick metal prevents scorching.
- Spoon for skimming. A small ladle or regular spoon works.
- Fine-mesh strainer and cheesecloth or a coffee filter. This removes fine solids.
- Clean, dry glass jar with a tight lid. Moisture shortens shelf life.
- Optional thermometer. Helpful if you like exact control.
Smart sourcing tips:
- Butter choice matters. Cultured, grass-fed butter makes ghee with big flavor.
- Salted butter works in a pinch. But the salt can scorch, so watch it close.
- Yield guide. One pound (454 g) of butter gives about 1.5 cups (about 350 g) of ghee.

Step-by-Step: How to Make Homemade Ghee
The method is simple. Still, the details matter. Follow these steps to master how to make homemade ghee on your first try.
-
Cut and melt
- Cut cold butter into chunks. Place in a clean, dry, heavy pot.
- Melt over medium heat until fully liquid. Do not rush this step.
-
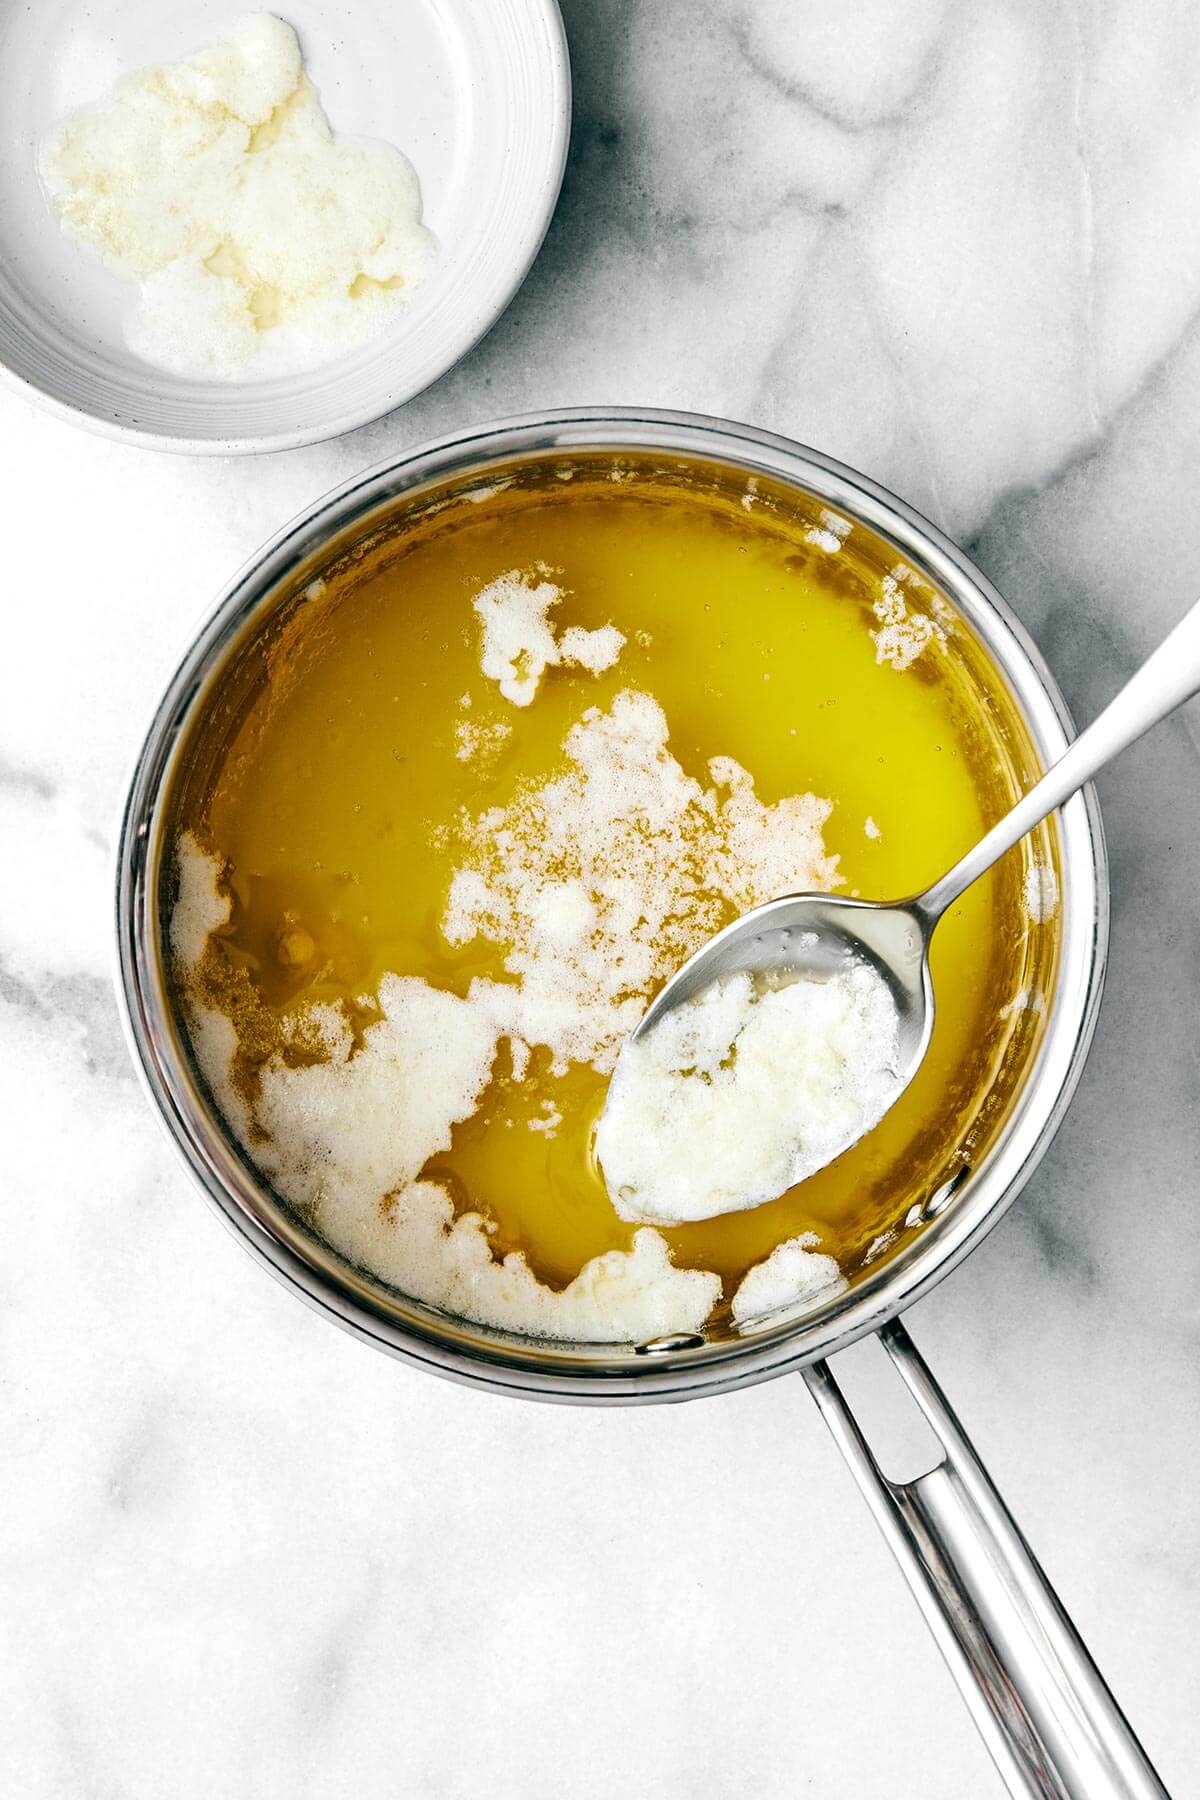
Simmer and skim
- Lower to medium-low. A gentle simmer is ideal.
- White foam (from milk proteins) will rise. Skim gently with a spoon.
-
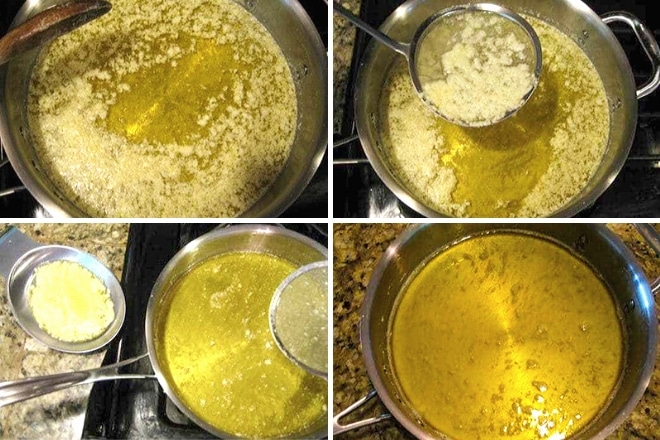
Watch the bubbles
- First, big noisy bubbles. That is water boiling off.
- Then, small, tight bubbles. The water is almost gone.
-
Brown the milk solids
- Keep heat low. The milk solids sink and turn light brown.
- Swirl the pot or stir gently to prevent sticking.
-
Check doneness with your senses
- Color: the fat turns clear and deep golden.
- Aroma: nutty, like toasted nuts or caramel.
- Sound: the crackling fades. That means water is gone.
-
Strain
- Take the pot off heat. Let it sit for 1–2 minutes.
- Strain through a cheesecloth-lined strainer into a clean, dry jar.
-
Cool and store
- Cool uncovered until just warm. Then seal and store.
Time guide:
- 8 ounces (225 g) butter: about 12–15 minutes.
- 1 pound (454 g) butter: about 20–25 minutes.
- 2 pounds (907 g) butter: about 30–40 minutes.
Personal tip: I once burned a batch by walking away “for a minute.” Now I set a 10-minute timer, stay close, and watch the color and sound. That simple habit saved many jars.

Visual Cues, Doneness, and Troubleshooting
Key cues:
- Foam stage: thick white foam at first. Skim it off.
- Clear stage: the fat looks glassy and bright.
- Brown stage: milk solids turn golden to light brown. Stop before they blacken.
Fixes to common issues:
- Burnt taste: solids got too dark. Next time, lower heat and pull earlier. A pinch of fresh ghee mixed in can soften the bitter edge, but strong burnt flavors cannot be fixed.
- Cloudy ghee: fine solids were not filtered. Strain again through a coffee filter.
- Grainy texture: normal when cooled fast. Warm and stir to smooth or embrace it; it melts the same.
- Milky layer on bottom: not fully strained. Reheat gently and strain again.
- Splashing or spitting: water in the pot or jar. Dry your tools well before you start.
Learning how to make homemade ghee is about reading sights, sounds, and smells. Once you see these cues, you will nail it every time.
Flavor Boosts and Everyday Uses
You can infuse flavors once the heat is off. Add a few aromatics to the hot ghee. Let steep for 5–10 minutes. Then strain again.
Great add-ins:
- Curry leaves for a classic South Asian aroma.
- Garlic or shallots for savory depth.
- Green cardamom for gentle sweetness.
- Whole spices like cumin, coriander, or black pepper for tempering.
Everyday uses:
- High-heat searing of steak, paneer, or tofu.
- Roasting vegetables and potatoes for crisp edges.
- Tadka for dal and sambar. Bloom spices in ghee for 30–60 seconds.
- Baking cookies or pie crusts for rich flavor.
- Swirl into rice, khichdi, eggs, or even morning coffee.
When you practice how to make homemade ghee, you unlock a daily flavor tool that fits many kitchens and diets.

Storage, Shelf Life, and Food Safety
Keep water out. Moisture is the main reason ghee spoils early. Use a clean, dry spoon every time.
Storage rules:
- Room temperature: up to 3 months in a cool, dark spot.
- Fridge: 6–12 months. The texture firms up, which many people like.
- Freezer: up to a year or more. Portion into small jars to avoid thawing the whole batch.
Safety tips:
- Sterilize jars in hot water and dry fully before use.
- Let ghee cool before sealing to avoid condensation.
- If it smells sour, paint-like, or very sharp, discard it.
Knowing how to make homemade ghee is only half the task. Storing it right keeps the flavor and your effort safe.

Nutrition and Health Notes
Ghee is pure butterfat. One tablespoon has about 112 calories and 12–13 g fat. It is rich in saturated fat, so enjoy in modest amounts.
Potential upsides discussed in food science:
- High smoke point supports stable cooking.
- Contains small amounts of fat-soluble vitamins A, E, and K.
- Trace short-chain fats like butyrate appear in ghee.
Cautions:
- Milk allergies: ghee is low in proteins, but trace casein can remain. Very sensitive folks should test carefully.
- Not a cure-all. It is a cooking fat, not medicine.
- For heart health concerns, discuss use with a clinician.
A balanced view helps. Learn how to make homemade ghee, enjoy it, and keep portions in check.

Cost Breakdown and Yield Tips
Learning how to make homemade ghee can save money. It often costs less than store jars, and the taste is brighter.
Quick math:
- 1 lb butter → about 1.5 cups ghee (roughly 350 g).
- If butter is 4 dollars per pound, your ghee costs about 2.67 dollars per cup.
- Store ghee often costs more per cup than this home yield.
Yield boosters:
- Use slow, low heat to avoid burning losses.
- Skim foam gently so you do not remove fat with it.
- Choose higher-fat, grass-fed butter for richer yield and color.
Frequently Asked Questions of how to make homemade ghee
How long does it take to make ghee at home?
Small batches take about 12–25 minutes. Bigger pots take longer because you must keep heat low.
Can I use salted butter to make ghee?
Yes, but watch the heat. Salt can make the milk solids brown faster and taste a bit sharper.
What color should finished ghee be?
Golden to deep amber is ideal. Very dark brown means it likely went too far and may taste bitter.
Do I need a thermometer for ghee?
No, but it helps. Most people learn by watching color, foam, and listening for the crackling to fade.
How to make homemade ghee from store-bought butter?
Follow the same steps. Melt, simmer, skim, brown the solids lightly, and strain.
How to make homemade ghee that is nutty but not burnt?
Keep heat low and watch for light brown solids and a toasty smell. Pull it as soon as the crackling calms and the color is deep gold.
How to make homemade ghee that stays clear and bright?
Use a clean, dry jar and strain through fine cloth. Avoid any water in tools, jars, or the pot.
How to make homemade ghee on induction or an electric stove?
Use low to medium-low heat and a heavy pot. Induction can run hot, so drop heat as soon as the foam rises.
Conclusion
You now know how to make homemade ghee with clear steps, signs, and fixes. Start with good butter, keep the heat low, and trust your senses. A few careful minutes turn simple butter into a rich, reliable kitchen staple.
Make a small batch this week and note the smell, sound, and color. Share your results, ask questions, or subscribe for more practical kitchen guides.