Measure, build a vented frame, add panels, and finish for a safe, snug fit.
If you want a clean, built-in kitchen look, learning how to make a refrigerator cabinet is a smart DIY move. I’ve built many of these for clients and in my own homes. This guide shows you the exact steps, the tools you need, and the mistakes to avoid, so you can nail how to make a refrigerator cabinet on the first try.
What You’re Building and Why It Matters
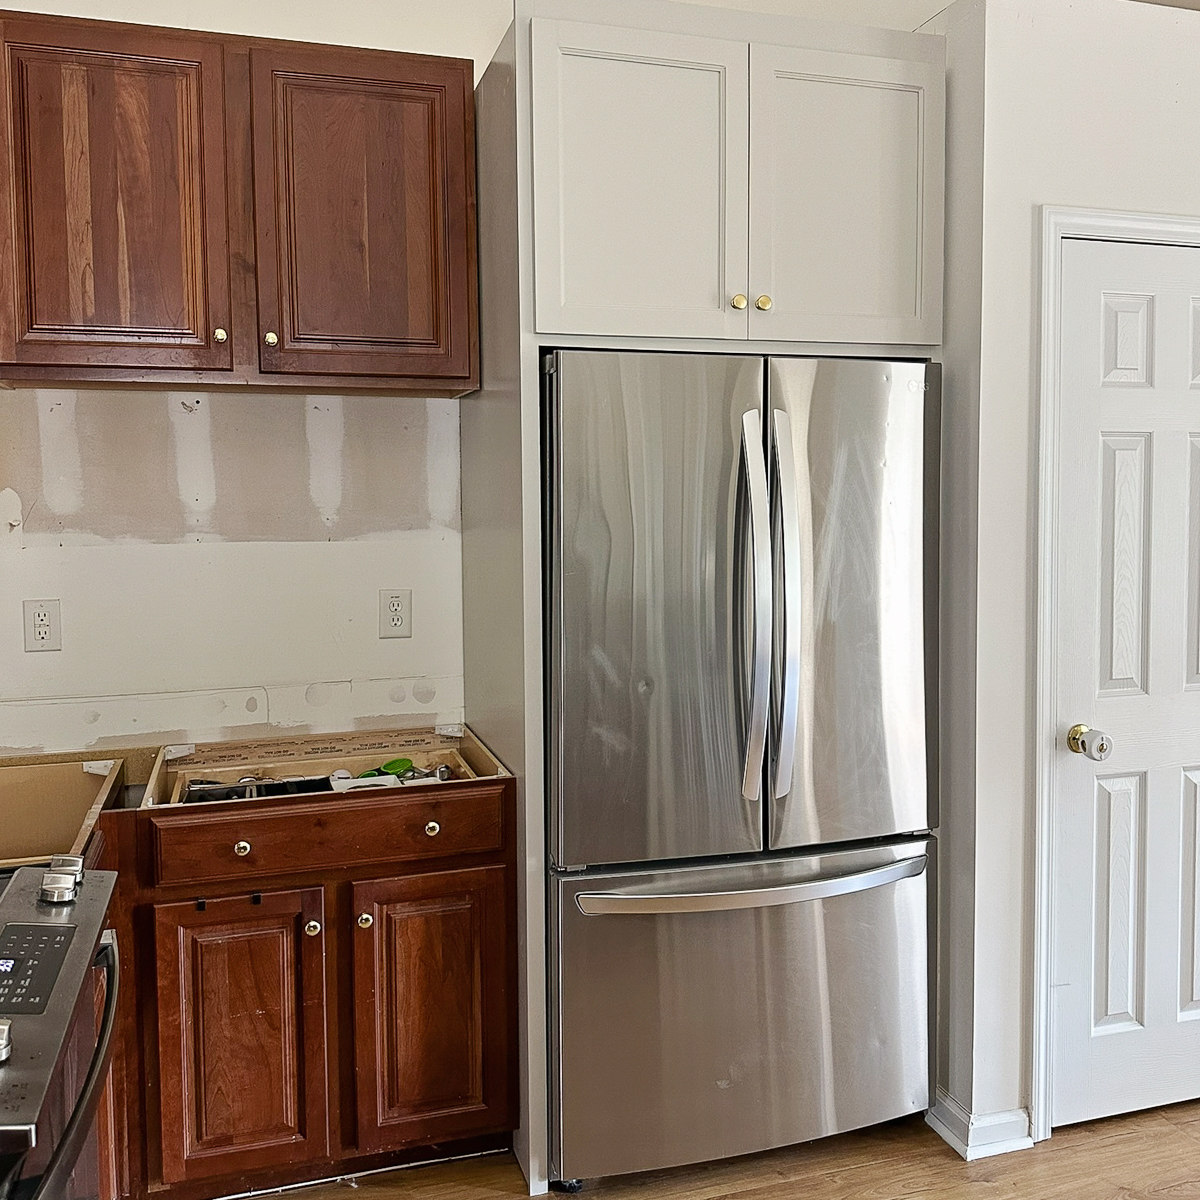
A refrigerator cabinet is the box, frame, and trim that surround your fridge. It holds the sides, the top bridge cabinet, and any filler pieces. Done well, it looks sleek and built-in. It also keeps air moving so the fridge can breathe.
This project blends carpentry with careful planning. You need the right size, strong parts, and safe airflow. If you want to master how to make a refrigerator cabinet, start with a clear plan and the fridge specs in hand.
Plan First: Size, Layout, and Venting
Before you cut wood, read the fridge manual. Look for the required clearances. Many fridges need about 0.5 to 1 inch on the sides, and 1 to 2 inches at the top and back. Some models vent from the front. Others vent up or back. Follow the rules for your unit.
Map the space. Note the outlet, the water line, any trim, and the floor level. Check the path to slide the fridge in and out. If you are unsure how to make a refrigerator cabinet for a tight spot, give yourself more space, not less.
Use this quick checklist:
- Measure width, depth, height of the fridge body and doors. Add the door swing.
- Add clearance per the manual. Do not guess.
- Confirm the floor is level. Plan for shims if not.
- Plan airflow: low intake, high exhaust, or front vent per the manual.
- Mark studs. Plan where to anchor the side panels and cleats.
- Confirm door swing clears walls and islands.
A little planning now saves hours later. It also keeps the fridge cool and safe.
Tools and Materials
You do not need a shop full of tools. But you do need the right basics.
Tools:
- Tape measure, level, and square for accurate layout.
- Stud finder and pencil for safe anchors.
- Circular saw or track saw for clean cuts.
- Drill/driver set for screws and pilot holes.
- Brad nailer with compressor or cordless for trim.
- Clamps, chisel, and scribe for tight fits.
- Oscillating multi-tool for small cuts in place.
- Safety gear: glasses, hearing protection, dust mask.
Materials:
- Cabinet-grade plywood, 3/4 inch, for side panels and shelves.
- Solid wood or plywood for a face frame and fillers.
- 1/4 inch plywood or skin panels for finished sides.
- Cleats and blocking, 1×2 or 1×3, for anchoring.
- Screws, pocket hole screws, and construction adhesive.
- Edge banding, caulk, primer, and paint or clear coat.
- Vent grills if the design needs top or bottom vents.
- Shims and an anti-tip bracket or strap.
Choose moisture-resistant plywood if near a water line. If you want to learn how to make a refrigerator cabinet that lasts, do not skimp on material quality.
Step-by-Step: How to Make a Refrigerator Cabinet
This is the simple flow I use on client jobs. It is safe, strong, and repeatable.
- Confirm specs and layout. Read the manual. Mark final cabinet width, depth, and height on the wall and floor.
- Prep the floor and wall. Check level. Snap reference lines. Locate studs. Run power and water lines where needed.
- Build a level base. Make a platform from 3/4 inch plywood. Shim it dead level. A level base keeps doors square.
- Add wall cleats. Screw 1x cleats to studs at the side panel lines. These hold the panels and add strength.
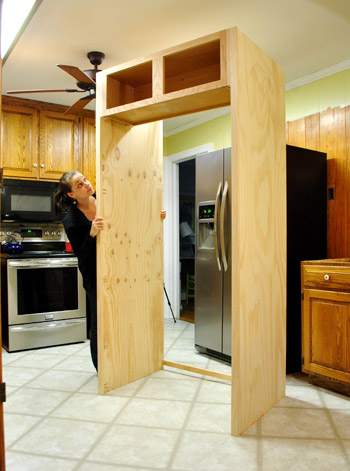
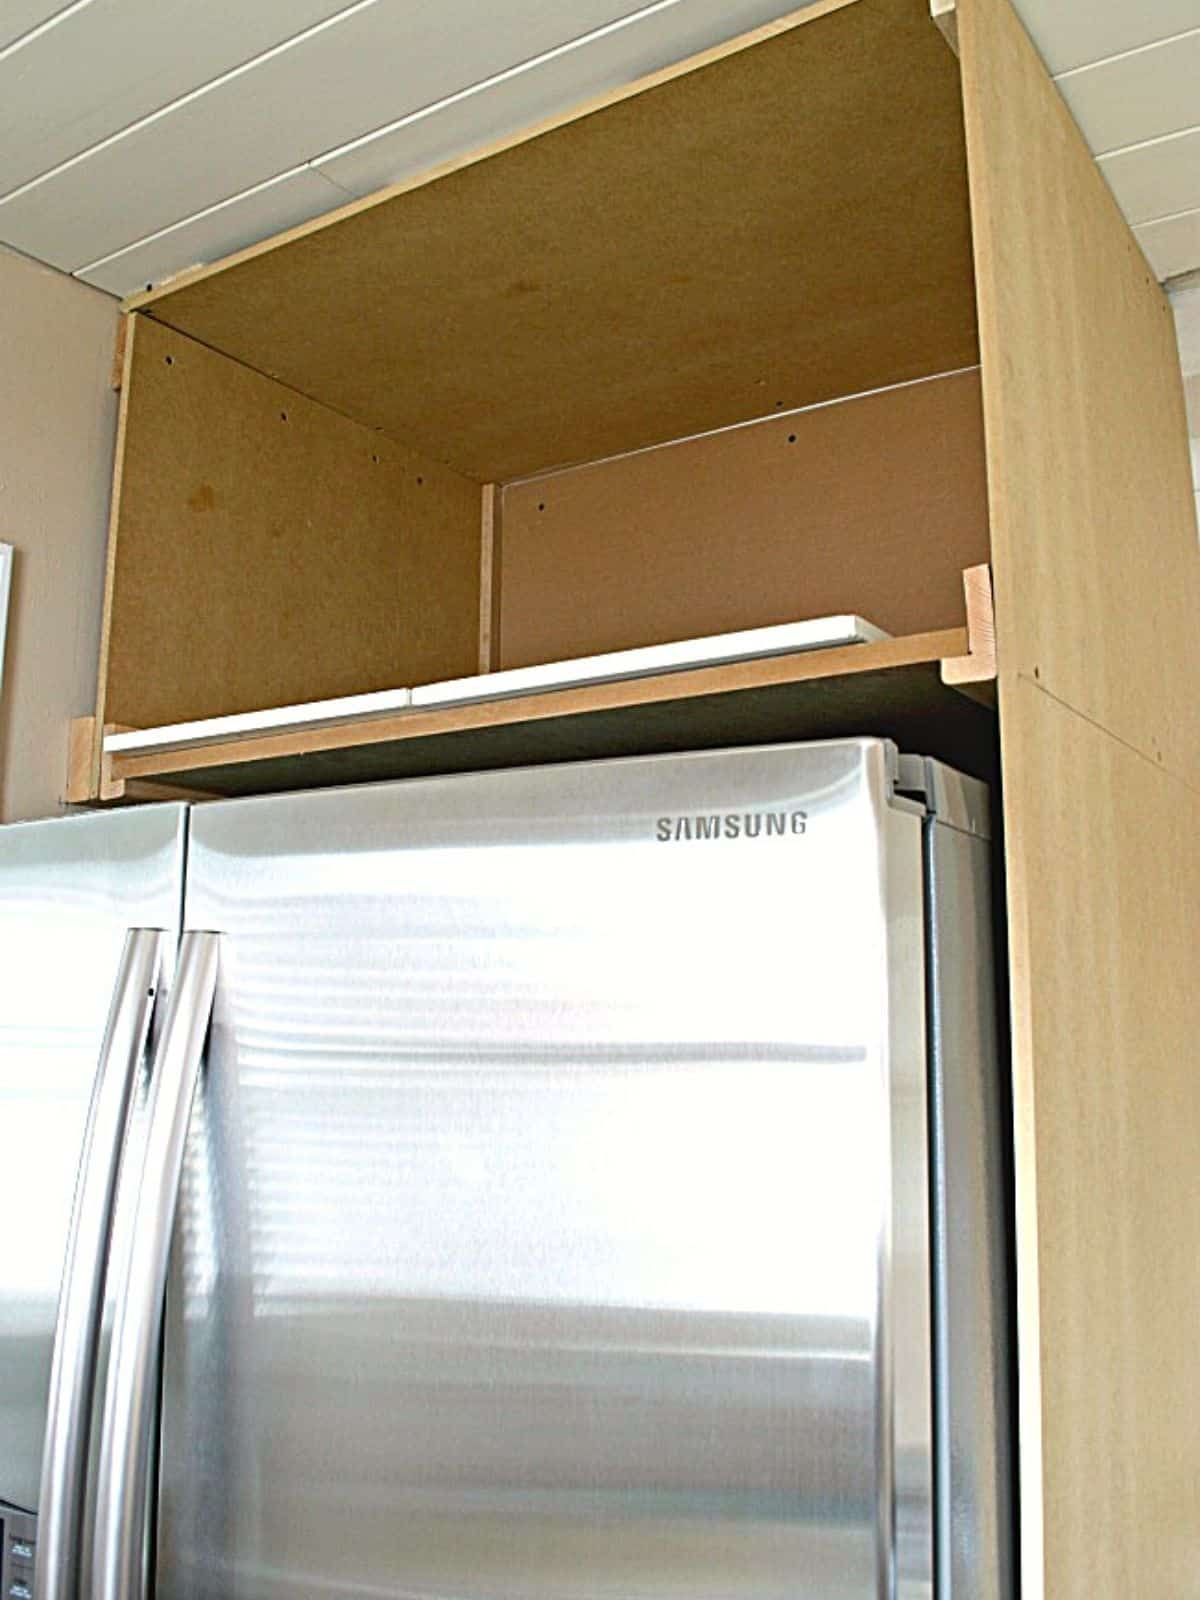
- Cut side panels. Use 3/4 inch plywood. Height is to the top of the bridge cabinet. Depth is the fridge depth plus needed clearance.
- Anchor side panels. Plumb them. Screw into wall cleats and the base. Use clamps to hold while you fasten.
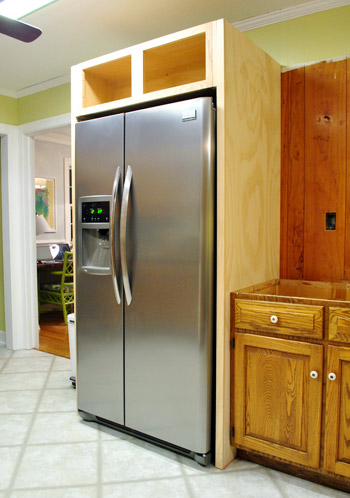
- Install the top bridge cabinet. You can buy a stock unit or build a box. Anchor into studs and into the side panels.
- Add a face frame or fillers. This hides gaps and sets the final opening. Scribe the fillers to the wall if it is not straight.
- Plan vents. If the fridge needs air up and out, add a vent grill at the top. If air flows in low, cut a slot at the toe area or use a louvered panel.
- Secure an anti-tip. Use a strap or bracket per the manual. This is a key safety step.
- Skin and finish the sides. Add 1/4 inch skins, edge banding, and trim. Fill holes. Sand smooth.
- Test fit the fridge. Slide it in. Check clearances, door swing, and airflow. Adjust shims and fillers if needed.
If you need a memory hook for how to make a refrigerator cabinet, think: base, panels, bridge, face, air, finish. That small checklist has saved me more than once.
.jpg)
Ventilation, Heat, and Safety
A fridge dumps heat as it cools. If the cabinet traps that heat, the unit runs hot. It will use more power. It can fail early. Manufacturer manuals and kitchen standards call for clear airflow. Respect that.
Rules of thumb, but always check your model:
- Side clearance: 0.5 to 1 inch.
- Top clearance: 1 to 2 inches.
- Back clearance: 1 to 2 inches unless front-vented.
- Air path: cool air in low, warm air out high.
Add grills or leave a shadow line at the top. Avoid solid boxes with no vents. Use an anti-tip bracket. Keep the outlet easy to reach. If you are set on how to make a refrigerator cabinet with a tight fit, make the venting even better.
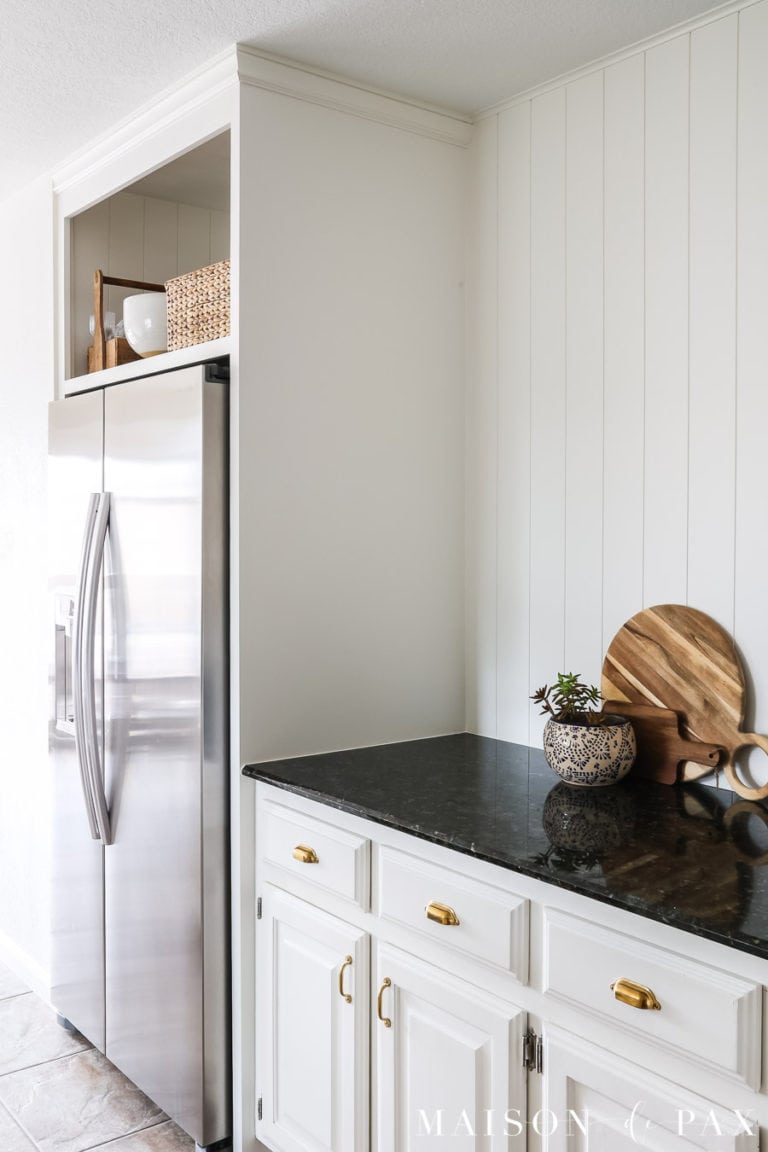
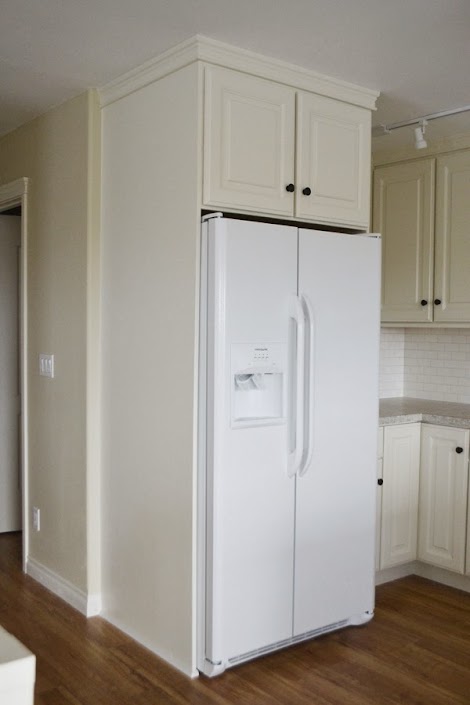
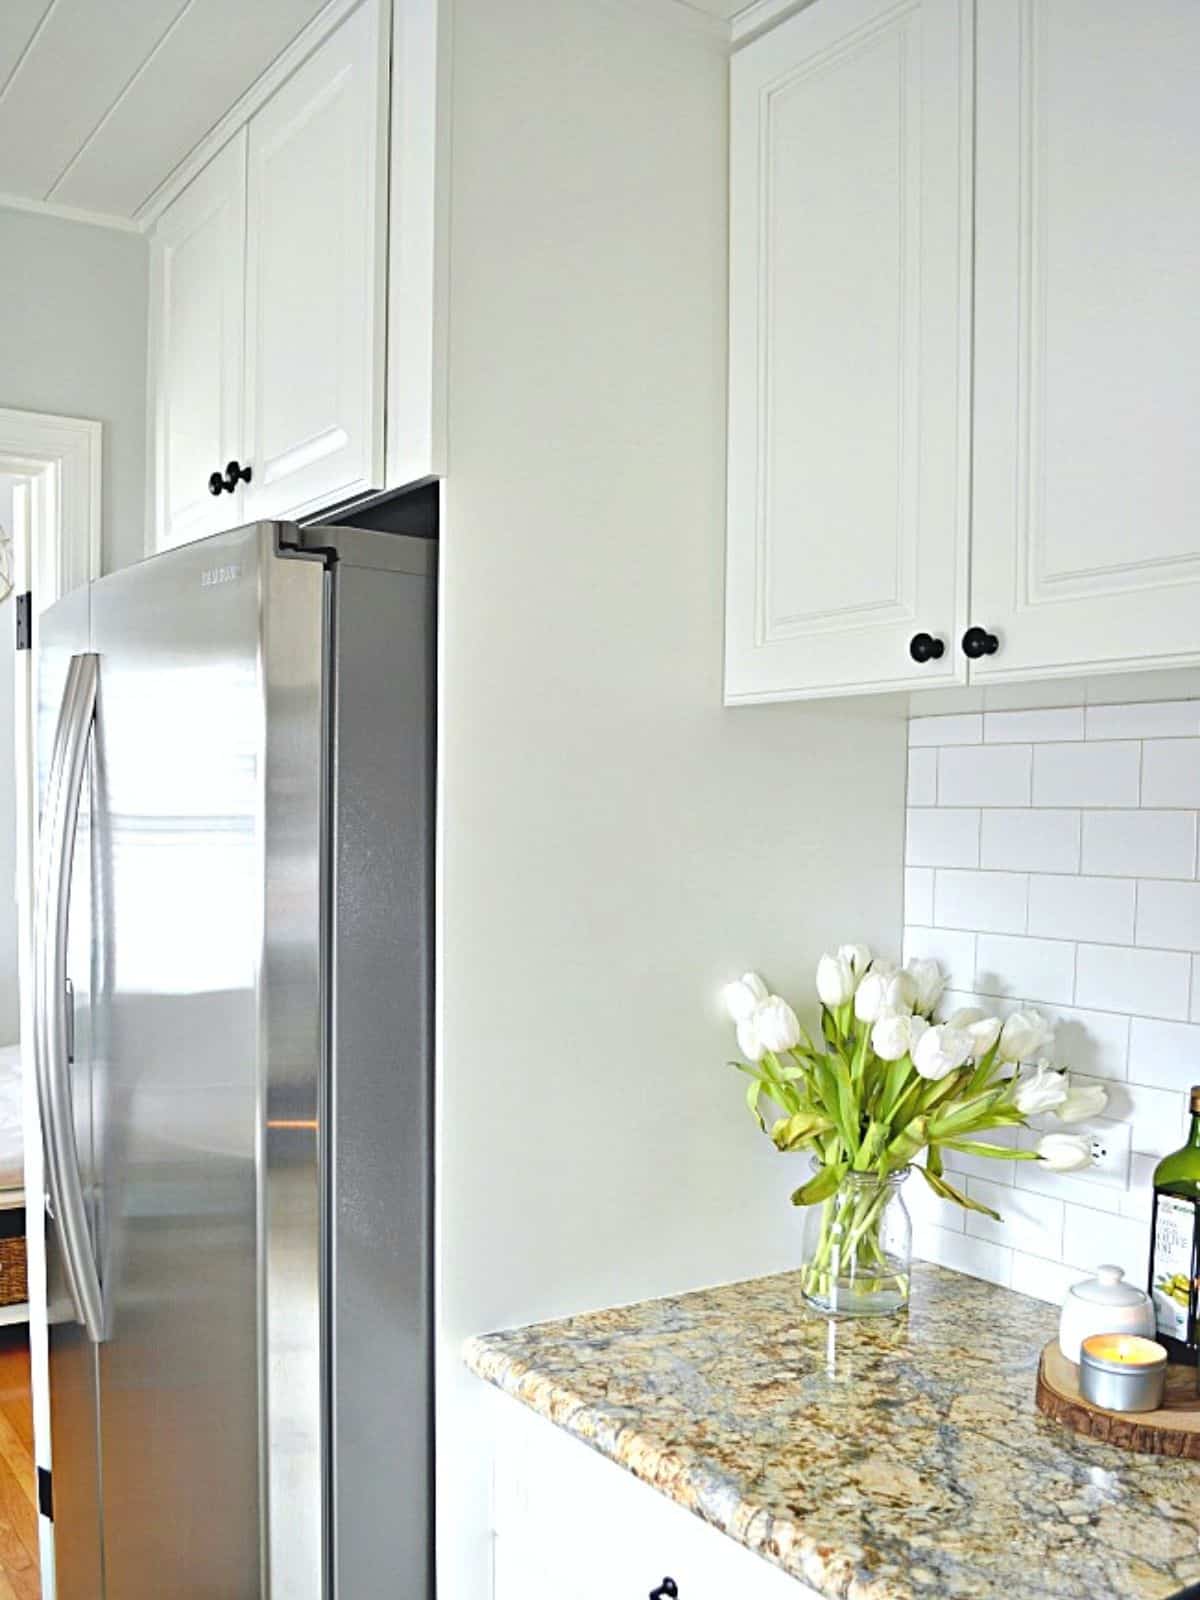
Finishing and Trim for a Built-In Look
Good trim hides small sins. Great trim makes it look custom. Keep lines clean and gaps small.
Tips I use on every job:
- Scribe the side filler to the wall. Walls are never perfect.
- Use a face frame to match nearby cabinets. Keep reveals even.
- Add edge banding on plywood edges. It looks like solid wood.
- Caulk tiny seams. Prime and paint with a cabinet-grade finish.
- Match toe-kick height and depth to the kitchen run.
If you care about how to make a refrigerator cabinet that blends in, spend time here. The finish sells the work.
Common Mistakes and How to Avoid Them
I have fixed many DIY builds. Most issues trace to the same few misses.
- No vent path. The fridge runs hot. Always add a clear air path.
- Tight to the wall. The door will not open all the way. Leave space for door swing.
- Out of level base. Doors will not align. Level the platform first.
- Weak anchors. Panels wobble. Screw into studs and use cleats.
- Guessing the opening. Every fridge is different. Read the manual first.
These fixes are fast if you plan for them. If you want a stress-free plan for how to make a refrigerator cabinet, start with airflow and level.
Cost, Time, and Skill Level
Most DIY builds cost less than custom shop work. But plan for both time and tools.
Typical ranges:
- Materials: 150 to 600 dollars for plywood, trim, and finish.
- Tools: 0 to 400 dollars if you need a saw and nailer.
- Time: 1 to 2 weekends for a careful DIYer.
If you keep asking how to make a refrigerator cabinet on a budget, start with plywood and paint. Upgrade later with doors or panels.

Maintenance, Access, and Future-Proofing
Make service simple. Plan for cleaning and for the day you swap the fridge.
Smart details:
- Leave an access slot for the outlet and water shutoff.
- Use removable grills or a screw-on panel at the top.
- Choose fillers that can be re-scribed if you change models.
- Keep the opening at least 1 inch wider than the current fridge if space allows.
These tips help anytime you rethink how to make a refrigerator cabinet for a new unit down the road.
Frequently Asked Questions of how to make a refrigerator cabinet
What clearance do I need around the fridge?
Follow the manual. Many units need 0.5 to 1 inch on the sides and 1 to 2 inches at the top and back. If it vents from the front, you may need less at the back.
Do I need vents in the cabinet?
Yes, unless the fridge is designed for zero-clearance with front venting. A low intake and a high exhaust path keep heat moving and protect the compressor.
Can I build with MDF instead of plywood?
Plywood is better near moisture and holds screws well. MDF can work for face frames and trim if it is sealed and kept dry.
How do I scribe panels to a crooked wall?
Hold the panel in place with a small gap at the tightest point. Scribe the wall line with a compass, cut to the line, and sand for a tight fit.
What if my floor is not level?
Build a base platform and shim it level before you set panels. A level base makes doors and reveals line up.
How can I make it look like a true built-in?
Add a face frame, match the toe-kick, and extend panels to the counter depth or more. Use paint or veneer that matches your cabinets.
Is a filler strip the same as a spacer?
A filler strip is a finished piece that fills a gap. A spacer is a hidden block that sets depth or width for mounting.
What size screws should I use?
Use 1.25 to 2.5 inch cabinet screws into studs and cleats. For trim and skins, use 18-gauge brads at 1 to 1.5 inches.
Can I put a microwave in the bridge cabinet?
Only if the cabinet is built for the load and heat, and if you add the right venting. Always follow the microwave install guide.
How do I move the fridge in without scratching the floor?
Lay down hardboard or a moving mat. Use furniture sliders and a helper. Go slow and watch water lines.
Conclusion
You now know how to make a refrigerator cabinet from plan to paint. Measure well, frame strong, and give the fridge room to breathe. The rest is clean cuts and calm steps.
Start with your model’s manual and a simple sketch. Work through base, panels, bridge, face, air, and finish. If you follow that flow, your cabinet will look great and work for years. Ready to build? Share your questions or your progress in the comments, and subscribe for more practical DIY guides.